Showing posts with label we made it. Show all posts

Thursday, June 10, 2010

StART--King Solomon and the Bee


This week for our kindergarten work we are concentrating on the letter "Bb". When I saw the book, King Solomon and the Bee, I knew it was just the thing for keeping with this weeks theme.
The letter "Bb", bugs and bees. A perfect fit.
"In this adaptation of the traditional legend, King Solomon is not only wise, but also able to talk to animals. After being stung on the nose, he summons all manner of insects to appear before him and demands to know who dared to attack him. A small bee confesses and begs forgiveness, promising to do the king a favor later. Solomon laughs, but the bee later helps him pass a test put to him by the Queen of Sheba." School Library Journal
The obvious choice of craft was a bumble bee craft.
We used:
craft sticks
black permanent marker
pom pom
wiggle eyes
black pipe cleaners
This is a super easy craft!
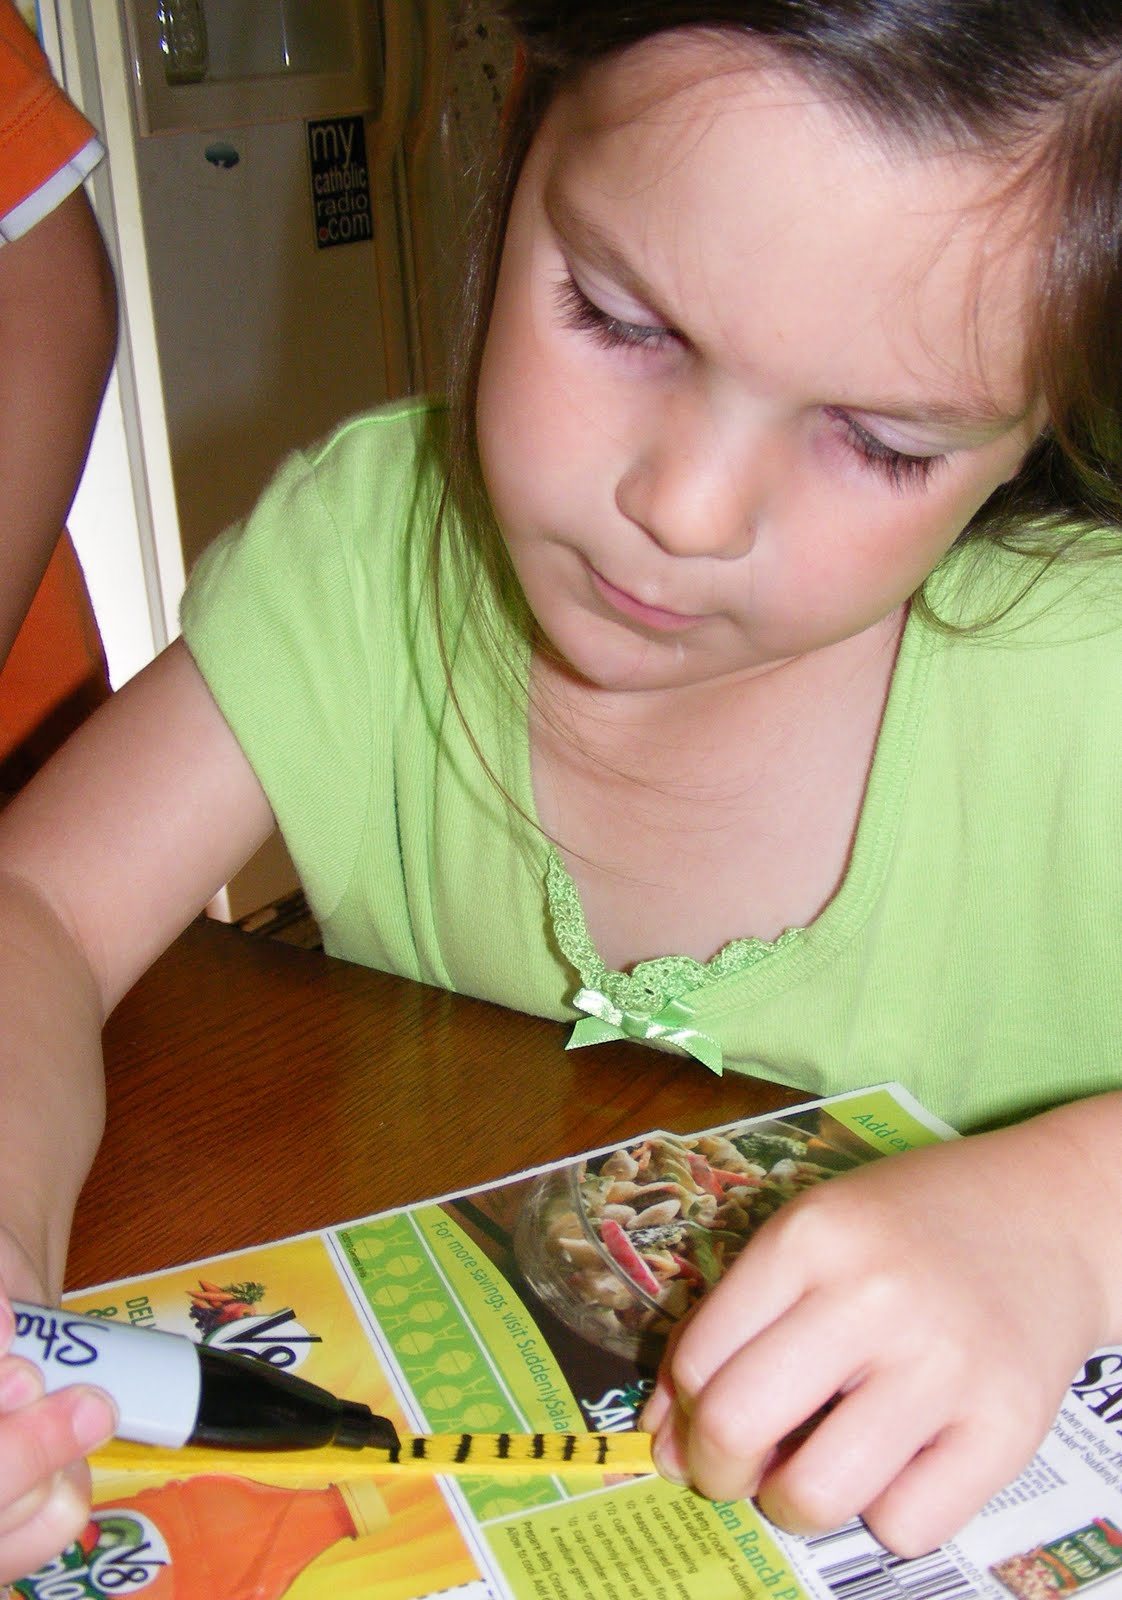
The first step is to draw black "bumblebee" lines on the craft stick.
I used yellow craft sticks, but you could paint them yellow.
Glue a pom pom to one end of the craft stick as seen in a picture below.
Glue wiggle eyes onto pom pom.
Use a black pipe cleaner to make wings and a "stinger".
The kids have been playing with these all day---and they were super simple to make.
Make sure to check out other stART projects here and
We Made It projects at Ramblings of a Crazy Woman.

Friday, March 19, 2010

We Made It: Easter Lollipop Flowers

Today we made a nice display of Easter lollipop flowers as seen here.
The first thing we did for these was to color some rice green. This is to put into the pot where we will display our "flowers".
To color your white rice, simply add liquid food coloring to the rice in a ziploc bag.
Shake--shake--shake.....add more food coloring as needed and shake some more.
After achieving the wanted color---I place the rice onto a baking sheet and put in the oven at 250 degrees for about 15 minutes. This sets the color and helps dry out the rice.
While the rice is drying, insert lollipop sticks into the candy. The easiest candy to use are Reese's Peanut Butter candies. It is easier to put the lollipop sticks into the candy if you use a toothpick to get the hole started in the candy.
I used plastic Easter cups for our "vases". Fill each cup halfway with something heavy--we used these glass discs. Making the cups heavy keeps them from easily tipping over.
Now fill each cup almost to the top with the green rice.
Add the lollopop flowers--and the there you go---Easter Lollipop Flowers!
See what other did this week at Ramblings of a Crazy Woman.

Friday, January 8, 2010

Snowy Handprint Tree


Since the temperature didn't get much above 10 degrees F. today, it was perfect weather for bringing a winter scene inside the house.
I found this idea at Kaboose.
We had everything needed to make this Snowy Handprint Tree:
construction paper(blue and white)
brown paint
glue
salt
First, cut a piece of white paper with a curvy cut. This is the snowy botton of your picture.
Glue this to the botton of the blue construction paper.

Now the fun part, make a brown handprint in the center of the blue paper.
Then use your fingers to "paint" a tree trunk to the botton of the "branches".
If you have impatient children whom are eager to get to the next step.....
they can blow-dry their paint dry.
I liked using clear school glue for the next step.
I thought the kids would use their fingers in the glue, but Luke refused to touch it, so I got out a paint brush.
First, paint the finger branches with glue and then sprinkle the glue with the salt.
This is closely related to glitter dump sprinkling--just as messy--but just as fun.
Dump the salt off the glue to reveal beautiful snowy tree branches.
Luke also made snowflakes in the blue sky.
I love Gracie's "tongue of concentration"!
I also love the pretty results of our wintery trees!
Check out more We Made It activities at Ramblings of a Crazy Woman.

Thursday, November 12, 2009

We Made It!--Indian Corn Craft

We are quite behind on our crafting as of late, but we did manage to make these cute indian corn decorations this week. I saw the idea last week at Two Hearts Together. I added a little more detail and a story to incorporate the big learners that I have in the house.
We used:
real indian corn
yellow and green construction paper
glue
a template found here
Thanksgiving Bible verses from here
scissors
We also incorportated the reading of my new favorite Thanksgiving book: P is for Pilgrim.
"Across the Atlantic Ocean,
a lone ship on a vast sea.
Ablaze with new hope,
all praying to be free." from P is for Pilgrim
"From the lives of our early settlers, who established the foundations for American freedoms and ideals, to today's celebrations, "P is for Pilgrim" colorfully examines the history and lore of Thanksgiving. This alphabet book pairs each letter with a short poem and a sidebar that provides further information about the ideas presented in the verses." Amazon review
I also love the illustrations in this book.
The Bible verses we used are from Christian Preschool Printables, one of my favorite resourses.
First Gracie and Luke removed the kernels from the corncob.
This was quite a time consumming task for the two of them, resulting in Gracie becoming a little hungry.
Luke stuck with this for longer than I thought he would. It is great work for those little finger muscles.
Kim and Luke both practiced their carefully dotting of the glue, and then applied an indian corn kernel to their "cob."
While the little kids worked on the corn, Mark and Grace traced and cut out the husk part of the craft out of green construction paper.
They then put a suitable Thanksgiving Bible verse on the husk.
Mark choose to cut out the verse and glue it to the husk, while Gracie wrote her verse.
I think they turned out very nice--and are now proudly displayed in our Thanksgiving craft montage area.
Check out all of this weeks We Made It crafts at Ramblings of a Crazy Woman.

Friday, October 23, 2009

We Made It: Friday Showcase...Halloween Luminary

Last year we made fall luminaries and they turned out so nice, I decided to revisit this idea and have Mark and Grace make "halloween luminaries".
Supplies needed:
small clear glass votive candle holders
halloween stickers
black and white tissue paper
white glue
tealight candle
First we put halloween stickers on the votive glass jars.
Mark made sure to place them "just right".
Water down white glue in a mixture of 2 parts glue and 1 part water.
Tear tissue paper into small pieces.
Use a paintbrush to put glue on the glass, lay the tissue onto the glue and then add another layer of glue. Continue doing this until covered--overlapping edges.
Apply the tissue paper right over the stickers.
Mark and Grace made these totally on their own!
The final step is to let the gluey candle holder dry.
It actually only took about 2 hours, even though, from the looks of it, it would take a lot longer.
Use a tealight inside the candle holder,
and then sit back and enjoy your children's handiwork.
Check out all of this week's We Made It-posts at Ramblings of a Crazy Woman.