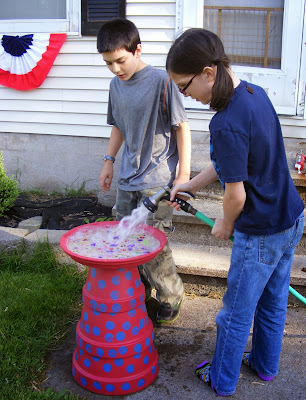
I look at Pinterest occasionally ....(cough, cough).. and I saw cute terracotta bird baths. I ended up combining several examples to complete a project completely our own.
We used three terracotta planters....10 inch, 12 inch and 14 inch. The base is 14 inches.
Any craft or home paint will work for this project because you seal it with a spray on sealant.
Colorful jewels, dry grout and Liquid Nails finishes this project.
Laura and Kimberly were happy to paint. Luke brushed a few strokes of paint on the base and then was done with this step.
We dotted our red pots with blue paint and foam "dot" brushes. These were only about a dollar.
Our craft paint was MOSTLY washable!
All stacked up...but not yet finished.
We sealed each pot with a spray on outdoor sealant. We used about three coats of sealant.
This step is best done outdoors. I had various "jewels" in our craft supplies, using Goop glue, I placed a bit of glue onto the base and then the kids put a jewel on the base with a Popsicle stick. The glue has a very strong smell, so do this step outside or in a very well ventilated area.
Continue gluing down jewels until the
base is covered as much as you wish.
We left the base to dry for 2 days, making sure the glue was totally set.
Mix grout in a throw away container.
Smush it between the jewels. We had a container of fast drying grout so we had to move pretty fast.
After completely covered, using a sponge, gently wipe away the excess grout.
We then allowed the grout to set for 2 days.
Kim and Luke enjoyed polishing the jewels.
They used a paper towel, a tiny bit of water and a lot of elbow grease.
Daddy taught the kids to use Liquid Nails and a caulk gun.
This was also allowed to dry for a couple hours.
Filling the birdbath!
I planned on having it out back with the bird feeders, but it came out so cute, the big kids insisted it remain in the front yard.
Ready for the birds to take a dip!


No comments:
Post a Comment