Showing posts with label tools for tots. Show all posts

Tuesday, October 13, 2009

Quick and Easy Homemade Felt Board


I have been wanting a felt board for the kids, but all the boards I saw while searching the net seemed too flimsy for my, ummmm, active children, so I set out to make a very, very sturdy one.
I used one of Becky's large wooden cake boards. At first I thought it would be too heavy, but I don't want the kids carrying it around, I want it to stay where I put it, so the wooden board is perfect.
I bought blue and green felt to divide the board in two. I also bought spray adhesive. This worked great for securing the felt down---it also sprayed glue on a lot of other stuff at my table. I think next time I use adhesive spray I will do it in a box, like when we use spray paint.
The felt was very easy to affix with the spray glue. I divided the front into "sky and land" and then simply wrapped the overlapping felt around to the back and sprayed glue and secured it down. I think this feltboard was finished in under 20 minutes. I may finished off the back with colorful duct tape if it starts to loosen up.
The first activity set I made for the felt board was a set to go along with the rhyme "Five Little Pumpkins".
But that is a story for another post---coming in the next few days!

Tuesday, March 3, 2009

Reusuable Mazes for Preschoolers


My preschoolers around here love to do mazes, and I am forever printing mazes off the internet only to have them completed in minutes and the kids asking for more.
I came up with a solution to this problem which I thought others may like to use with their own preschoolers.
I have printed easy mazes from the internet, laminated them and then bound them together with big key rings, forming a reusable book. The laminate is perfect for dry erase markers.
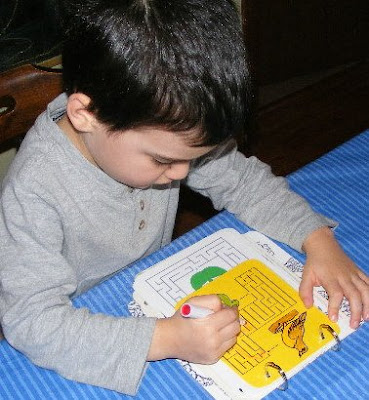
This group of mazes have a "spring" theme. I plan on other seasonal themes as the year rolls on.

Luke is an expert at completing mazes.
Kimberly does surprisingly well. She will be 3 in May and she especially loves the mazes with an easy path. I found this Dora the Explorer maze here.
Good job, Kimberly!
You can see the key rings above. I used a hole punch to make the holes.
I found most of the printables at DLTK Kids. They provide a large assortment of mazes all put into categories--this is a super resource for very easy mazes!

Friday, February 27, 2009

Tools for Tots--ocean waves in a bottle

This weeks Unplugged project was -bottles-and this certainly fits into this category.
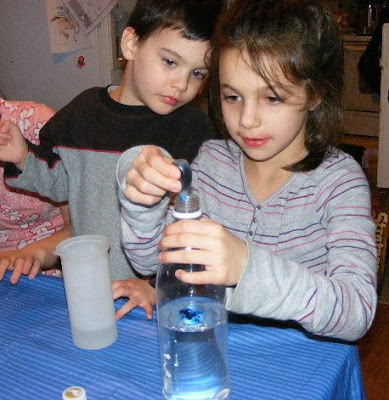
This is a fun project to put together for the tots in your home. You will also quickly discover that every age group is enthralled with this "ocean in a bottle."
Collect the materials:
empty plastic bottle-we used a 1 liter bottle
vegetable oil
water
blue food coloring
glitter
small funnel-not necessary but useful

An item that is also not required but very helpful is a teenager.:-)
Fill the bottle half full of water.
Check for spills
Add a few drops of blue food coloring.
This part was fun in itself! We all enjoyed watching the color swirl around.
We then added some glitter to the blue water. You don't need to do this, but it adds a little "sparkle" that is appealing to the eye.
Fill the bottle to within 2 inches of the top with vegetable oil. Notice the helpful teenager in this picture.
Put the top on the bottle tightly. Seal it with a hot glue gun or duct tape. Now give the ocean to a child and watch the fun. If you tip it gently you gave make wonderful waves. If you spin it you can make a small tornado, shake it up and watch everything seperate back into its original state.
You can roll it back and forth on the floor or table.
The kids added A LOT of glitter and after the bottle sat the glittered settled on top of the water, but below the oil--a very interesting effect!
You can't deny the look on our tot's face--this is a real fun Tool for Tots!
Next week's Unplugged project theme is -HAPPY

Friday, January 9, 2009

Tools for Tots--Build a Snowman activity

Winter is in full swing around here with snow everyday and about 18 inches on the ground, so what better activity to do with the tots than make creative snowman scenes.
I found this idea at the Family Fun website, and then turned it in to a re-usable Tot-School activity.
Family Fun provided the printables that I used for this Tool for Tots.
Snowman scene
facial expressions
clothing
I printed two copies of the scene out to use as play boards (one for Kim and one for Luke). I printed one copy of the facial expressions and clothing--these are the "playing pieces". I laminated everything for durability.
I then made control cards with the snowmen dressed in a certain way. I did this by taping the pieces onto the snowman scene and then printed them out at half size. You can see these above as Mark helped me laminate them.
Here are the pieces that I printed and laminated.
printed and laminated control cards
Kim and Luke will look at the control card and then copy this onto their own "snowman scene."
Kmiberly working on one of the cards.
Success!!!
I have since trimmed the corners off these cards---they points are very sharp---they are now curved.
I made four different control cards and cut out the certain pieces that make up the control. I also cut out a few other pieces so they can be used to make snowmen creatively.
Carisa, at 1+1+1=1 has other Tools to Tots at her great website. Make sure to visit her.

Monday, January 5, 2009

Tools for Tots-Learning Wheels

Carisa, the hostess of Tot School also has a section on her blog dedicated to "Tools for Tots". These are simply learning tools we make ourselves for our tots. I had been planning on making the learning wheels for Kim and Luke and I have finally gotten a chance to complete them.
I simply printed out the learning wheels by clicking on the picture of the disks on this "Tools for Tots" page. I then used a marker to color the end of a clothespin to match the colors on the shape wheel, I drew the shape on the end of the clothespin to match the shape wheel.
To do this activity, just clip the clothespin to the correct color or shape. It is a very good activity for little finger muscles. Luke did this and also could name the colors as he did it--except for the color gray.
It was a lot of work for Kimberly to grasp and open the clothespins...but she did it!!! It took quite a bit of time for her, but she stuck to it and succeeded.
This is a great activity to keep the littlest among us busy when the bigger kids are doing school or we are trying to get dinner. Thanks "Tools for Tots" ladies for sharing all of your wonderful ideas.

Tuesday, December 2, 2008

Tools for Tots-Toddler Dice

"Tools for Tots are simply learning tools we make ourselves for our tots." Carisa at 1+1+1=1 has been keeping track of homemade learning tools, and I have finally had a chance to join in the fun-(and learning.)
What I made for the littlest learners around here are early learning dice. Suitable for tossing, throwing and stepping on-although, I don't know how long they will last if they continue to be stepped on.

I simply cut two half-pint milk cartons into equal squares. I just eyeballed the cutting, and then kept trimming until I got squares the size I wanted. Then, fit the two cartons together with the bottoms of the cartons facing out.
These squares are surprisingly strong.
Cover them with paper and then add whatever you want. I put the numbers 1-3 on our pair of dice, because these are the numbers we have been recognizing and counting.
Today, Kim and Luke each took a dice, and then using the fish from out counting mats game, they rolled the dice, told me the number and then counted the correct number of fish into their bowl.
This game also provided an opportunity to practice taking turns.
Luke is NOT very good at the taking turns skill.

We enjoyed a lot of number fun with this easy, FREE activity.