Thursday, October 31, 2013

Opening our Thanksgiving Kiwi Crate

 Come and explore the Thanksgiving Kiwi Crate with us.
We open our box and our greeted by this cute little kiwi bird.
 The overview of the Thanksgiving projects:  My Turkey Place Cards (6 place cards in total) and My Turkey Game.
 On the back of the overview page is a cute color and cut out activity. These can be played with using the scene printed on the inside of the Kiwi Crate box.
There is also a sticker which can be added to your Kiwi poster.  This poster comes in your first Kiwi Crate when you subscribe.
 The first activity is My Turkey Game.  It has a low messiness level and a medium parental participation.
 
Great instructions...step by step in full color.
 
Various elements of the turkey game.
Even a new box of jumbo crayons. 
Popsicle sticks, wiggle eyes and foamie stickums.
Instructions and directions for the Turkey Game.
Activity number two: My Turkey Place Cards.
A list of items needed and complete instructions.

 
Everything needed to make the turkey place cards.  Scissors are needed for this project.  If you subscribe to Kiwi Crate, you get scissors included in your first crate.
There is even air dry clay included in this Thanksgiving crate.
I can't stress how wonderful all our Kiwi Crates have been, especially the ease of the projects, perfect for little hands.  My 7 and 8 year olds can follow the wonderful picture instructions and they do the crafts with minimal help from me.

Happy Halloween-2013

 Our soldier, witch and angel
 Attention!
 This angel with a crooked halo found the best place to trick or treat
1 1/2 hours work and 16 pounds of candy

Monday, October 28, 2013

The best "monster" cake ever!!!

Gracie's birthday is tomorrow and this is the cake Becky came up with.
I do believe this is my favorite cake yet!

Sunday, October 27, 2013

Racing Jellyfish...courtesy of Kiwi Crate

 We completed our last project from this months Kiwi Crate: The Racing Jellyfish.
 Very, very cute!
 The exciting part of this craft is that it is rigged with string to "race".
Kim and Luke loved these races...thanks again Kiwi Crate for another great activity.

Thursday, October 24, 2013

Happy 25th Birthday, Becky!

 Becky turned 25 a few days ago and we finally had a chance to celebrate with her.
She is our cake decorator....she doesn't care for cake, so Daddy got her an ice cream cake.
 Blow, Becky, blow!
Becky's new "Flirty Apron". 

Our future soldier?

Luke's taking right after big brother Matt.

Our Glow Worms

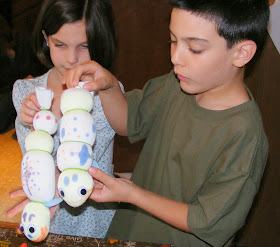
 Today we made our Glow Friends from this months Kiwi Crate.
 As always, everything was included to make these soft, cute friends, right down to the rubberbands and fabric markers.

Luke is "charging up" his glow friend.  You put them in the bright light, and then they glow beautifully.  They will make perfect night time friends for Luke and Kim.

A Pie Straight from the Field

 Once a year....when I am feeling quite ambitious....we read a lot of pumpkin books and then decide to have the fun of making pumpkin pies from real pumpkins...not a can of pumpkin (also known as the easy way of pumpkin pie making)
Before pie making, though, we read good books and count pumpkin seeds.
 First we need to clean the pumpkins out.  This is a favorite messy fall activity that all kids should partake in.  Save the seeds to roast.
 I simply cook the pumpkins by placing them upside down in a big pan.  Cover the pan and pumpkins  with foil and cook on 350 degrees for an hour and 1/2 to two hours...until it is tender.
 After about 2 hours, remove from oven.  I like to turn over my pumpkins to see how they look.  Of course, it is probably a better idea to wait until the pumpkins cool.
 When the pumpkin is cool, spoon the cooked pumpkin from the shell.
Put a very cute child in charge of mashing the pumpkin to a smooth consistency.
 Now you are ready to make your favorite pumpkin pie.  I use the traditional Libby's recipe.
 Ready for the oven.
Pumpkin pie...from field to table.

Sunday, October 20, 2013

Autumn T-Shirts

We made cute autumn t-shirts this past Saturday.
Last year, I bought these large foam stamps from Oriental Trading Co. for a very economical price.
I can't find this particular set, but I did find other sets suitable for t-shirts, especially these leaves.
 I found these bright orange shirts at Michael's Crafts.
Put some cardboard inside the shirts.  I use cereal boxes for this.
 Instead of dipping the large stamps into the fabric paint, Kim paints it thickly onto the stamp.
 Stamp away
 Kimmy's shirt.
 Grace put a lot of detail into her stamps.
 Posing with the finished product!